
I have been trying for years to make good pie crust. For some reason it was one food/recipe that I really struggled with. They were tough, over cooked or sometimes undercooked. They would get soggy after a short time and just overall were not good.
But last year I learned a trick that works well for me. It is lard. Yes, I know lard? Unhealthy and not very appetizing sounding, but stay with me here. Crisco has not been around for ever. What did our grandmothers and past generations use before us? Lard. It is what they had and it worked.
As far as health goes, have you looked at the ingredients in crisco? Well, it is not exactly healthy. I tried all butter in my crusts and it did not give me good results. I knew I needed something besides using all butter.
When we started raising hogs a few years ago, I was skeptical of getting the lard from them. But once I tried it I was sold. It makes the best pie crust. Finally, I could make a good crust. It was light, flaky, and tender. The dough rolled out better than any other pie dough that I had made. I knew right away I had found my secret to pie dough.
I like getting my lard from our hogs. I know where they came from and what they have eaten. But our hogs are really lean. We raise them that way to have better quality meat. The downside to this is that we don’t get a lot of fat off of them for lard. So, when I run out of our lard, I break down and buy this from the store.

It is not the best option, but it works great. You can find it in the aisle with the oil or in the Mexican food section of your store.
The other trick I have learned in making pie crust is to keep it cold. The water needs to be cold and the dough needs to be kept cold when rolling and baking.
So, here is how I make my pie crust. This recipe makes a double crust.


Making Pie Crust Recipe
A favorite pie crust recipe with easy to make instructions.
Ingredients
- 2 cups flour
- 1/2 cup butter
- 1/2 cup lard
- 1/2 cup cold water
- pinch salt
Instructions
- In a bowl mix flour and salt.
- Cut in butter and lard until it looks like the picture above. It should be a bit crumbly with the chunks of dough about pea size.
- Add water 1 tablespoon at a time. Be careful because you do not want this to be too wet, that is why you add it 1 tablespoon at a time. Mix until it forms a dough like the picture above.
- Form into a ball and flatten into a disk and wrap in plastic wrap. Refrigerate for at least one hour. You want this cold.
- Roll dough out and place in a pie pan. If you are filling this crust, fill, roll out the second crust and place on top. Or just fill it if you are not placing a second crust on top. Refrigerate for another hour. This is important. Cold dough helps keep your crust from shrinking during baking.
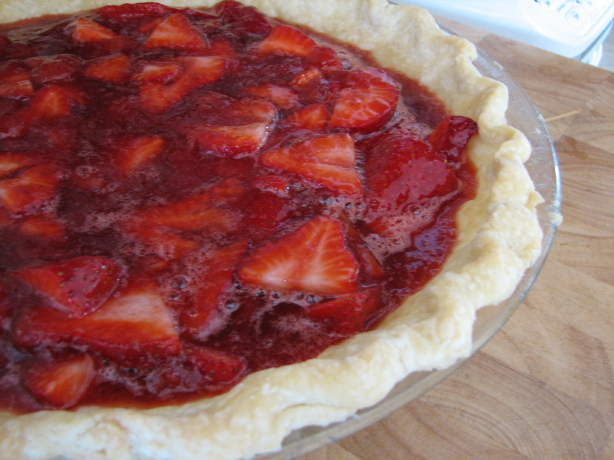
- If you are needing a prebaked crust for a pie. Maybe a pudding pie or like the strawberry pie above, follow these directions.
- Roll out dough, place in pan, prick with a fork. Then line the crust with foil and place beans or rice on top of the foil. You can also use pie weights, but rice or beans is much cheaper. Sorry I did not get a picture of this step.
- Bake at 375 degrees for 10 minutes.
- Remove foil and rice/beans/weights, whatever you use, then bake for another 9 minutes.
- Cool and fill. Enjoy your pie.
Nutrition Information:
Yield:
24Serving Size:
1Amount Per Serving: Calories: 110Total Fat: 8gSaturated Fat: 4gTrans Fat: 0gUnsaturated Fat: 4gCholesterol: 14mgSodium: 36mgCarbohydrates: 8gFiber: 0gSugar: 0gProtein: 1g
Nutritional values are approximate and aren't always accurate.
The recipe that I got from my grandma specifically states to use only lard. Grandmas knew what they were doing! 🙂
Well, I’m with you, that is a beautiful pie crust. I truly believe there are somethings that are best done the traditional/fat way 🙂
Our grannies knew best on many subjects.
Great pie crust tutorial!! Great job, Lynn. Thanks.
I’ve never tried lard, I should though, your crust looks wonderful~!
Thanks for the great tips! I’m like you were….my pie crusts are okay, but they could be MUCH better! I will definitely try your tips. Yours looks great!
It sure is pretty. I have never tried to make a pie crust. My Mommy makes the best crust with crisco! When I need a crust I usually call her : ). Maybe I will try though soon. This tutorial was great!
It’s such a shame low fat dieting and pastry don’t go together. I wish they did.
How about a tutorial on how to flute the edges? I use the same recipe you posted (it’s my mother-in-laws and she is the crust queen) but I can’t get my edges to look good.
Your crust turned out beautifully! I’ve been using an all-butter recipe; I think the the taste is great, but the crust is more crumbly than flaky. Maybe I’ll try lard next time.
I am making a apple pie tomrrow with you pie crust again. This will be my third time and it is the best crust I have found. Here is my apple pie with the crust https://www.mommyskitchen.net/2008/12/southern-plates-apple-pie-at-our.html
The photos of the actual finished pie is your crust i updated my apple pie photo since the crust turned out so good. Ty
@Tina @ Mommys Kitchen, I am so glad you liked this crust. It really does work well. And your apple pie looks so good. I do the same basic thing with foil on pies and it really works well to keep the crust from burning.